
Pedometer Design with OSD335x SiP, the AM335x System in Package
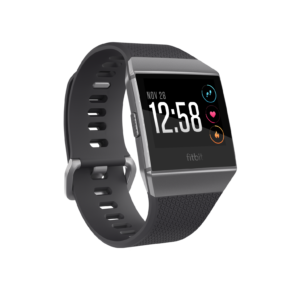
Wearable sensors are becoming more common, and the demand for these devices has only increased with the growth of the Internet-of-Things (IoT). These wearables range all the way from consumer items like Fitbits to medical devices for hospital patients. To keep up with this demand, designers need a flexible and powerful platform to develop their application quickly and reliably. The OSD335x-SM System-in-Package (SiP), a full Linux computer in the space of a US nickel (or 20 Euro cent piece), is just that platform. Its small form factor, high level of integration, and abundance of open source hardware and software tools make it ideal for developers working on new wearables. The OSD335x small size makes it ideal for space-constrained applications, even pedometer applications like the Fitbit. The rest of this post will show you how easy it is to quickly build your own pedometer prototype using the OSD335x with standard off the shelf components! (Detailed instructions can be found on Hackster.)
Rapidly Prototype a Pedometer Based on the AM335x
We decided to rapidly prototype our pedometer design with the AM335x based SiP using PocketBeagle® from BeagleBoard.org® and MikroElektronika Click Boards™. The development boards from BeagleBoard.org® are excellent examples of using the OSD335x SiP in a design. BeagleBoard.org® a customer of Octavo Systems, is a 501c3 Foundation, focused on education. PocketBeagle® is a completely open source, highly affordable super tiny single board computer featuring the AM335x based OSD335x-SM. It has header pins that conform to the MikroElektronika mikroBUS™ Click Board™ standard, an open standard interface with over 450 compatible add-on boards that include sensors through communication. Several Click Boards perform various health-monitoring functions such as ECG, EMG, temperature and heart rate. A new Pedometer Click Board specifically integrates an accelerometer sensor with an algorithm to detect and count steps. These platforms can be used to prototype many kinds of wearable application circuits with minimal effort.
The goal of our pedometer design is to detect and display the total step count of an individual. In order to achieve this, two hardware additions are required for PocketBeagle®:
- Pedometer 3 Click Board™ – For Collecting Steps
- OLED C Click Board™– To Display the Step Count
Collecting Step Count Data
We chose the Pedometer 3 Click Board to monitor the step count. This board features the KX126 micromachined accelerometer from Kionix that includes pedometer, orientation, tap/double-tap, motion detection, and free fall algorithms. The MEMS sensor works on differential capacitance principles. Under acceleration, capacitive plates move relative to fixed capacitive plates anchored to the chip substrate. The capacitance delta due to the change in position of the plates is measured, converted to an analog voltage, amplified, and sent through an analog-to-digital converter. An internal ASIC translates this value into an acceleration based on the user-programmable g-range, filter settings, and data rates. The pedometer state machine enables additional functionality, including user-selectable overflow, watermark, and increment interrupts.
While that is all cool what we really care about is that the Pedometer 3 Click Board allows us to easily add the pedometer functionality to our PocketBeagle. We can just plug it in and we are ready to move on!
Displaying the Pedometer Status and Step Count
To complete our design, we needed to add a user interface so user can see keep track of how well they are doing. We chose to add the OLED C Click Board to our design so that we could incorporate fun animations to indicate the sensor status and provide feedback and encouragement to the user on their step count. PocketBeagle® headers can fit two Click Boards, one on the SPI0 interface (position 1) and one on the I2C2 interface (position 2). For our design, we chose to place the display in position 1 and the Pedometer in position 2. Just like the pedometer all we need to do is plug in the screen. That is it for the hardware development! That wasn’t do bad. Now lets tackle the software.

Software for the Pedometer Prototype
Choosing to use PocketBeagle® and MikroElektronika Click Boards™ for prototyping not only make the hardware design uniquely easy it also simplifies the software as well. PocketBeagle® can run a Debian Linux distribution that includes support for many different programming languages. Additionally, MikroElektronika Click Boards™ have many software libraries developed around their hardware, which makes interfacing and using the features of the board extremely easy. We chose python to quickly pull it all together.
Since the Pedometer Click communicates on the I2C interface, we were able to use the open-source Python GPIO library from Adafruit to easily read and write registers in the KX126. This helpful app note from Kionix walked us through the necessary register configurations to enable and use the step counter. Using these resources, we quickly created a Python driver for the pedometer and were able to read out step count data from the sensor.
To enable and use the the OLED C Click, we used this open-source device tree overlay for the PocketBeagle and the Linux frame buffer imageviewer (fbi) package. The Python Image Library allowed us to make and format images which could then be displayed on the OLED using a simple script to execute fbi commands. From there, we used images of rising z’s for sleep and of a person walking to create simple animations for the display.
Software Structure Overview
Our software implementation can be broken into a few distinct functionalities defined by a simple state machine:
- INIT:
- Configure the pedometer by writing configuration registers in the KX126 over I2C2
- WAIT:
- Measure the step count from the KX126 on I2C2 and increment a running total
- If the current step total is 0, cycle through the sleep animation on the OLED over SPI0
- MOVE:
- Measure the step count from the KX126 on I2C2 and increment a running total
- If the step total is increasing, cycle through the walking animation on the OLED over SPI0
- REST:
- Measure the step count from the KX126 on I2C2 and increment a running total
- If the step total is non-zero and non-increasing, display the step total on the OLED over SPI0
- Reset the step total after 30 seconds of inactivity
The KX126 was configured for high-resolution 100Hz output data rate, averaging 4 acceleration samples for each data point. Various parameters for min/max impact amplitude, min/max time interval, and more tuned the step detection sensitivity for our particular application.
Source Project and Resources For the AM335x System in Package Based Pedometer
That’s it! You now have a simple pedometer using a few off the shelf components and opensource software! You can track your steps or stick it on your dog to get steps while you binge watch Netflix!

This was just a quick introduction and overview of the project, please visit the Hackster page for the full set of instructions.
This is just an example of the types of solutions you can quickly prototype using the AM335x based System in package. The only limit is your imagination. Share your projects on hackster, in the comments, or in our forums!
Stay up to date on the latest projects from Octavo Systems. Sign Up for our Mailing List!
"*" indicates required fields
